Tuesday, August 31, 2010
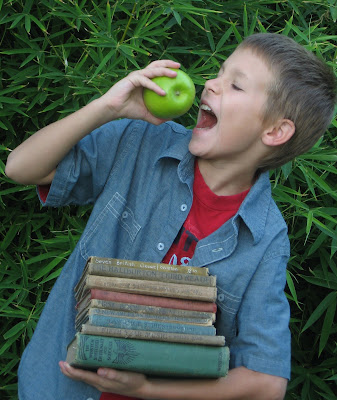
Today He Turned 11

Wednesday, August 25, 2010
See Me In Better Homes & Gardens


 Photo credit: BHG.com
 Photo credit BHG.com
 Photo credit BHG.com
 Photo credit BHG.com
Sunday, August 22, 2010
Back 2 School


Saturday, August 21, 2010
Friday, August 20, 2010
Halloween Delights And Cake

Wednesday, August 18, 2010
Back To School Teachers Gift


 I hope everyone had a wonderful summer! It seems summer will never end here in Texas. We are in the middle of a heat wave. Temps have been over 100 degrees for days! It’s a perfect excuse to stay in and craft. Meet the teacher day is this Thursday for my almost eleven year old son Keegan. For some reason my sweet little boy has grown a big fat attitude this summer. Is it because he is almost a teenager? Who knows. I thought just in case this “attitude” doesn’t go away I better butter up his new teacher. I created this notepad holder. It would be the perfect teacher gift, hostess gift, or a little something special for anyone you want to thank. It takes very little supplies and time. You could even make a bunch and save for all those last minute gifts you always end up needing.
Supplies
3 Sheets of Coordinating Patterned 12 x 12 scrapbook paper ( I used My Mind’s Eye- Out and About)
Bone Folder
Glossy Accents (by Ranger)
Small 8 x 5 inch Note Pad (I bought mine in bulk from Sam’s Club)
Assorted Matching Ribbon
Brad and Flower Accent
Sewing Machine (Not necessary but nice)
Ruler or Scoring Tool (I use Martha Stewarts Scoring tool)
1 Pick out one of the papers to be the outside of the holder, one for the inside, and one for the pocket.
2 Fold the outside paper in half. The pretty side will be on the outside. Use a bone folder to make the fold crisp.

3 Fold the inside paper in half with the pretty side in. Use the bone folder again.
Trim both down to 10 x 12 inches.

4 Cut the 3rd paper for the pocket down to 12 x 4 inches. Fold in half with pretty side of paper on inside.
5 Using a glue stick, Glue Glider Pro or other adhesive to glue the inside and outside paper together.

6 Glue three outside edges of pocket to inside of holder.

7 I sewed the outside edge and center of pocket. You do not have to do this but it makes it so much nicer and more durable!
8 Take left over paper from the outside and cut down to 5 x 2 inches.
Score the paper longways at ¾ inch and 1 inch.

9 Fold and glue to top of note pad

10 Add buttons, rhinestones, bows, stickers, or any flat embellishment to the top. I used Glossy accents to apply my buttons. It will make any thing stick!

Glue (I used hot glue) ribbon around the outside. Use a ruler when applying to keep it straight. Go all the way around leaving extra for tying.
11 Poke a hole near the front though the ribbon and paper. Insert brad.
12 I cut a little scrap of paper matching the inside and glued on top of the brad’s metal prongs.
13 Place your note book in the pocket and pencils or markers in the other.
Please feel free to pass this tutorial on! I appreciate it!
Brandy
Tuesday, August 17, 2010
Preview Up Coming Tutorial


Thursday, August 12, 2010
Autumn Blessings Flip Book

Autumn Blessings Flip Book
Autumn is my favorite time of year. I love to slow down and count my blessings when the leaves start to turn glorious colors, families come together to bake and cook, and the garden offers its bounty. Come count your blessings with me and make this Autumn flip book and holder. The book has many layers of new and vintage ribbons, papers, gems, glitter, and embellishments. It will have places for you to journal what your thankful for, record your favorite fall memories, and add autumn pictures. You will also make a Plexiglas holder that can adorn your home year around. The holder will have antique mother of pearl buttons, real silver glitter, and vintage lace. In the class you will learn many techniques you need for that vintage distressed look. All the supplies are include. You can however, bring Fall stamps (rubber or acrylic), photos, and any little collected treasures you might want to add. So come on over and creatively put your blessings to paper to remember what your thankful for.
Wednesday, August 11, 2010
Scrapbooking?!?!
I use almost every tool and product known to man (maybe that should be to woman) for scrapbooking. I get asked if I scrapbook all the time. I mean seriously all the time. When I say "no" I get weird looks and Huh? For some reason I just don't like scrapbooking in its original since. I don't know why. Maybe its that big 12 x 12 blank space staring back at me. It seems to me there are "rules" for scrapbooking. I don't like rules when I create. Or it could even be the whole proportion and make things straight thing. I'm not very good at making things straight. (for proof see above-crooked page) But..... I dream, hope, and so desire to be a designer for scrapbook companies. I want to be on a design team, teach workshops, be part of CHA (Craft Hobby Assosiacion), and get free samples dang it! So practice makes perfect. I am practicing every day. I'm practicing teaching, scrapbooking, and different techniques. Why just this morning I taught my Keegan how to blend ink. And just yesterday I taught Scrappy- doo (our dog) how to use the cuttlebug. He just watched but, I'm sure he could apply what I taught him. So look out scrapbooking world. Here I come and I dream BIG.
Tuesday, August 10, 2010
New Cubbies

I have been wanting to add some cubbies to one wall of my studio for a while now. All of the ones I found were just to expensive for my frugal ways. So after some brain storming and sweet talking this is what I did.First, I found some white shelves at Target for only $20.oo dollars! You can find them here. Then (after sweet talking) my very talented hubby cut wood squares and added them vertically on each self. He also used nails to assemble the shelves instead of the hardware that came with them. They are surprisingly sturdy for cheap shelves. The cost $40.oo. Oh and all that sweet talking;) You could stack them up or flip them around to fit your room. I'm going to add pretty papers to the backs and side of mine when I have time. I just thought I would share my idea for cheap cubbies!
Saturday, August 7, 2010
High Cotton Art Camp

Well I can't wait any longer. Its time for my little announcement. I am honored to be teaching at a brand new local event. Some of the most lovely women I know have organized a wonderful retreat called High Cotton Art Camp. The event will be held in my very own town of Abilene, Texas.It will take place October 15th and 16th
I absolutely assure you it is going to be fabulous. So many amazing women are taking part in this that I am just giddy with excitement. You can go HERE to the web site to get all the details.It would be great if you spread the news too, so feel free to add the button to your blog.


